
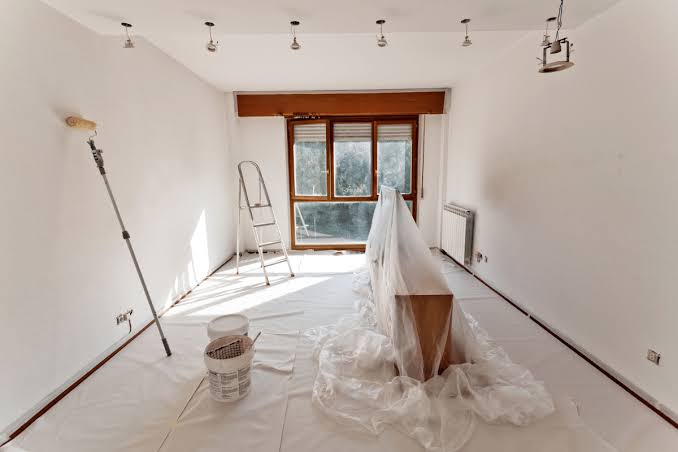
Painting a room is one of the easiest ways to refresh your home without paying for a major renovation. A new coat of paint can make an old room look cleaner, brighten a dark space, and give your home a completely different feel. The best part is that you do not need to hire an expensive painting company to achieve attractive results. With the right preparation, tools, and techniques, you can paint a room yourself and save a considerable amount of money.
However, getting a professional-looking finish takes more than opening a paint can and applying color to the walls. Uneven coverage, visible brush marks, paint splashes, and rough edges can make even expensive paint look disappointing. Careful planning and a little patience can help you avoid these problems.
Whether you want to update your bedroom, living room, kitchen, or home office, this guide explains how to paint a room like a professional while keeping your expenses under control.
Plan Your Painting Project Before Buying Supplies
A successful painting project begins with a clear plan. Before purchasing anything, decide which room you want to paint, what color you prefer, and whether the walls need repairs.
Walk around the room and inspect the existing paint. Look for cracks, peeling areas, stains, holes, and uneven surfaces. These problems should be addressed before painting because fresh paint will not hide every imperfection.
Measure the walls to estimate how much paint you need. Multiply the length of each wall by its height, then subtract the approximate area of large windows and doors. Compare your measurements with the coverage information printed on the paint container.
Most paint products list an estimated coverage area per gallon, but the actual amount required depends on the wall surface, paint quality, color change, and number of coats. Rough or porous walls may absorb more paint than smooth, previously painted surfaces.
It is usually better to calculate your needs carefully than to buy several extra cans that may never be used. At the same time, avoid purchasing too little paint, as finding an exact color match later can be difficult.
Choose Affordable Paint Without Sacrificing Quality
Paint prices vary widely, but the most expensive product is not always necessary for an ordinary room. A good-quality paint in the right finish can provide excellent results without exceeding your budget.
Before choosing a product, consider the room’s purpose. Bedrooms and living rooms may not need the same level of stain resistance as a busy kitchen or hallway.
Understand Different Paint Finishes
Paint finish affects both the appearance and maintenance of your walls.
Flat or matte paint has a soft appearance and can help hide minor wall imperfections. It is often suitable for ceilings and low-traffic rooms, although some flat finishes are less washable than other options.
Eggshell paint has a slight sheen and is a popular choice for living rooms and bedrooms. It offers a balance between appearance and everyday cleaning.
Satin paint has a more noticeable sheen and is often used in hallways, family rooms, and other areas that need regular cleaning. It can highlight surface imperfections more than flat paint.
Semi-gloss paint is commonly used on trim, doors, and certain moisture-prone surfaces. Its harder finish can make cleaning easier, but it may emphasize uneven areas.
Always check the manufacturer’s recommendations for the specific surface and room conditions.
Buy Paint at the Right Time
If your project is flexible, compare prices at different home improvement stores before purchasing supplies. Look for legitimate sales, seasonal promotions, and discounts on painting accessories.
Some stores offer reduced prices on mis-tinted paint. These products may be useful if you are flexible about color and have enough paint available for the entire project. However, make sure the quantity is sufficient and that the paint is suitable for your intended surface.
Avoid buying paint simply because it is inexpensive. A product that requires several extra coats may not provide the savings you expected.
Gather the Tools You Actually Need
You do not need a professional painter’s entire equipment collection to paint one room. Buying a few reliable tools and using them properly can make the job easier and reduce waste.
Here are the basic supplies to consider:
- Interior paint suitable for your walls
- Primer, when required
- A quality angled paintbrush
- A roller frame and suitable roller covers
- A paint tray or roller bucket
- Painter’s tape
- Drop cloths or protective floor coverings
- Sandpaper or a sanding sponge
- Wall filler and a putty knife
- A sponge, mild cleaner, and clean cloths
- A sturdy step ladder
- Gloves and eye protection when appropriate
Choose roller covers based on the texture of your walls. Smooth walls generally need shorter naps, while textured surfaces may require thicker roller covers to reach recessed areas.
A good brush can be worth the extra cost because it often provides better control around corners, windows, and trim. You can save money by cleaning and storing reusable tools correctly instead of replacing them after every project.
If you only need a tool for a single job, consider borrowing it from a friend or renting it rather than buying something expensive.
Prepare the Room to Prevent Costly Mistakes
Preparation is one of the most important parts of painting. Professional painters spend time getting surfaces ready because the quality of the final finish depends heavily on the condition of the walls.
Start by removing small furniture, decorations, wall art, and other items that could get in the way. Move larger furniture toward the center of the room and cover it completely.
Protect the floor with drop cloths. Secure them so they do not slide while you work. Remove switch plates and outlet covers when safe to do so, and keep screws in a small container so they are easy to find later.
Turn off the relevant electrical circuit before removing electrical covers if needed, and never paint inside electrical outlets. If you are unsure about electrical safety, leave the covers in place and protect the area carefully.
Clean the Walls
Dust, grease, and dirt can prevent paint from sticking properly. Use a suitable cleaner and a damp sponge to remove marks and grime. Kitchens may need extra attention because cooking can leave oily residue on the walls.
Allow the walls to dry completely before applying paint. Painting over damp surfaces can affect adhesion and the final appearance.
Repair Holes and Cracks
Use an appropriate wall filler to repair small nail holes and minor imperfections. Apply it according to the product instructions, allow it to dry, and sand the repaired areas until they are smooth.
Wear suitable eye protection and a dust mask when sanding. If you are working in an older home, be cautious about disturbing old paint because it may contain lead. In the United States, homes built before 1978 may have lead-based paint. Follow appropriate testing and safety guidance before sanding or scraping old painted surfaces.
For large cracks, recurring damage, or signs of water intrusion, identify and address the underlying problem before painting.
Apply Painter’s Tape Carefully
Painter’s tape can help protect trim, window frames, and other edges. Press the tape down firmly so paint is less likely to seep underneath.
Do not assume tape will correct every uneven edge. Clean surfaces and careful brushwork are still necessary for a neat result.
Decide Whether You Need Primer
Primer can improve paint adhesion, help cover stains, and create a more consistent surface. However, using it unnecessarily can add to your costs and extend the project.
Primer is especially useful when painting over bare drywall, repaired areas, certain stains, or surfaces with significant color differences. It may also be needed when changing from a dark color to a much lighter one, depending on the paint and the existing surface.
If the walls are already painted, clean, sound, and in reasonably good condition, a separate primer may not be necessary. Some paint products include primer-related features, but these do not eliminate the need for a dedicated primer in every situation.
Follow the instructions on your paint and primer containers. Using the right product for the surface is more important than applying extra coats without a clear reason.
Use the Correct Painting Technique
Once the walls are clean, dry, and prepared, you can begin painting. Working in a consistent order helps you avoid missed spots and reduces the chance of creating uneven marks.
Start With the Edges
Use an angled brush to paint the areas where a roller cannot easily reach. These include corners, the edges around windows and doors, and the areas near the ceiling and baseboards.
Work in manageable sections rather than painting all the edges in the room at once. This allows you to blend brushed areas with the rolled paint while they are still workable.
Avoid loading the brush with too much paint. Excess paint can drip, collect in corners, and create thick lines along the edges.
Roll the Walls in Sections
Pour a reasonable amount of paint into your tray or roller bucket. Load the roller evenly and remove excess paint before applying it to the wall.
Work in sections, using overlapping strokes to distribute the paint. Many painters use a loose W or M pattern to spread paint before filling in the gaps. Finish with light, consistent strokes in the same direction to help create an even appearance.
Do not press too hard on the roller. Excessive pressure can produce uneven coverage and force paint out around the edges of the roller.
Maintain a wet edge as you move across the wall. This means overlapping fresh paint with the adjacent section before the previous section dries. It can help reduce visible lines and differences in sheen.
Check the wall from different angles and under the room’s lighting to spot missed areas while the paint is still workable.
Apply Two Coats When Necessary
Many walls need two coats for even color and reliable coverage, particularly when changing colors or painting over a darker surface. However, the number of coats depends on the paint, the existing color, the wall condition, and the manufacturer’s guidance.
Allow the first coat to dry for the recommended time before applying another. Do not assume a surface is ready simply because it feels dry to the touch.
Applying the next coat too soon can affect the finish and may cause marks or uneven coverage. On the other hand, waiting far longer than necessary usually does not improve the result.
Use the same application method for each coat. Consistent roller pressure, even paint loading, and careful overlap help the finished walls look more uniform.
If the color still looks uneven after the recommended coats, inspect the surface and consider whether additional preparation or a suitable primer is needed instead of repeatedly adding paint.
Save Money by Painting in the Right Order
A sensible work sequence can prevent wasted effort and reduce the risk of damaging finished surfaces.
For a typical room, a useful order is:
- Prepare and protect the room.
- Clean, repair, and sand the walls as needed.
- Apply primer where required.
- Paint the ceiling if it is part of the project.
- Paint the walls.
- Finish trim and doors if they are included.
- Remove masking tape carefully and clean the workspace.
If you are painting both the ceiling and walls, completing the ceiling first usually helps prevent splashes from damaging freshly painted walls.
Remove painter’s tape according to its instructions. Depending on the product, it may be best to remove it while the paint is slightly wet or after it has dried enough to resist smearing. Pull the tape slowly at an angle to reduce the chance of lifting the paint.
Keep a small amount of leftover paint in a properly sealed, clearly labeled container for future touch-ups. Store it according to the manufacturer’s instructions and keep it away from children and pets.
Avoid Common Painting Mistakes
Some painting mistakes are easy to prevent but expensive or time-consuming to correct.
Skipping preparation: Dirt, peeling paint, and rough repairs can remain visible beneath the new finish. Clean and repair the walls before starting.
Using the wrong roller cover: A roller that is unsuitable for the wall texture may leave an uneven finish. Match the roller cover to the surface and paint type.
Applying too much paint: Thick layers can drip, form ridges, and take longer to dry. Load your brush or roller evenly and spread the paint without excessive pressure.
Painting over damp walls: Moisture can interfere with adhesion and cause future problems. Allow cleaned or repaired surfaces to dry completely.
Ignoring ventilation: Open suitable windows and doors when possible, and follow the paint label’s ventilation and safety instructions. Keep children and pets away from the work area.
Rushing between coats: Paint needs the recommended drying time. Follow the manufacturer’s instructions instead of relying only on how the surface looks.
Buying the wrong color: A shade can appear different under natural and artificial lighting. Test a sample on the wall before committing to several gallons.
Choose Colors That Make the Room Look Better
Paint color can change the way a room feels without requiring any structural improvements. Light shades such as soft white, pale gray, and warm beige can help many rooms feel brighter. Deeper colors, including navy, forest green, or charcoal, can create a more dramatic appearance when used thoughtfully.
The best choice depends on the room’s natural light, size, furniture, and overall design. A color that looks attractive in a store may appear quite different on a large wall.
Purchase a small sample and apply it to a section of the wall. Observe it during the morning, afternoon, and evening, and check how it looks with your existing lights and furniture.
If your budget is limited, consider refreshing the walls while leaving the ceiling, doors, and trim in good condition. You can also create a feature wall instead of painting the entire room in a different color.
These options can change the room’s appearance without requiring as much paint or labor.
How Much Does It Cost to Paint a Room Yourself?
The cost of painting a room depends on its size, the paint selected, the condition of the walls, and the tools you already own.
A small bedroom with smooth, previously painted walls may require relatively little preparation. A larger living room with damaged drywall, high ceilings, or a major color change may need more paint, primer, equipment, and time.
To estimate your expenses, consider these main categories:
| Expense | What affects the cost |
| Paint | Room size, coverage, color, and number of coats |
| Primer | Surface condition and the type of existing paint |
| Brushes and rollers | Quality, quantity, and whether tools can be reused |
| Wall repairs | Number and size of holes, cracks, and damaged areas |
| Protection supplies | Drop cloths, tape, and floor coverings |
| Additional equipment | Ladders, extension poles, and specialty tools |
For an accurate estimate, compare current prices at local home improvement stores and calculate the quantities needed for your particular room.
Doing the work yourself can save labor expenses, but the savings depend on the project’s complexity. If the walls have major damage, peeling paint that may contain lead, or persistent moisture problems, professional help may be the safer and more economical choice.
Keep Your Newly Painted Walls Looking Fresh
After completing the project, give the paint enough time to cure before washing the walls or placing furniture directly against them. Drying and curing are different processes, and the full curing period depends on the paint product and environmental conditions.
When cleaning becomes necessary, begin with a soft cloth or sponge and a gentle cleaning method approved for the paint finish. Test the method in a hidden area first, especially on flat or matte paint.
Avoid scrubbing too hard, as this can change the sheen or damage the surface. Clean marks promptly when practical, and keep leftover paint for small repairs.
Good ventilation, reasonable humidity, and following the manufacturer’s maintenance instructions can also help preserve the finish.
Give Your Room a Professional Finish on a Budget
Painting a room like a professional does not require the most expensive paint or a large collection of tools. The real difference comes from careful preparation, selecting suitable materials, using consistent techniques, and allowing enough time for each stage of the project.
Measure the room before shopping, choose a paint finish that matches your needs, repair the walls properly, and use the right brush and roller. Apply paint in manageable sections, maintain a wet edge, and follow the recommended drying times between coats.
Most importantly, do not rush the preparation just to finish sooner. Smooth surfaces and clean edges often make a bigger difference to the final appearance than spending extra money on premium supplies.
With a realistic budget and a thoughtful approach, you can refresh your home’s interior, improve its appearance, and enjoy professional-looking results without paying for a complete renovation.